 |
User Guide
Document number: hc.70 © 2026 1stWorks Corporation. All rights reserved. |
| Contents | First | Back | Next | Last | Printable | 1stWorks Support |
hotCam
During a session, you can display graphics, charts, slides and other images. There are several methods to choose from. The hotCam icon changes depending on the method you choose.
| Icon | Method | Description |
Still shots |
||
| Still | One-time screenshot sent to a hotCam window. | |
| Still Window | One-time screenshot of a selected window in a multi-window application, sent to a hotCam window. | |
| Still Collaborative | One-time screenshot sent to a hotWeb window with the Toolbox enabled so you can mark-up the screenshot. | |
Timed Camera - * NEW in Revision 8.00.008x - Presenter Pro licenses ONLY * Some of our Presenters have asked for a small screen to confirm the charts being sent out so that the Presenter can ensure, quite literally, that everyone is "on the same page". On first use, the Preview window will display centered on the screen but simply drag it to a more convenient location and its new position will be remembered for future use in the hotComm settings file. Note that the hotComm Presenter Preview window can be selected to turn off by unticking the check box for it in the hotComm hotCam "Set Timer Interval" dialogue. |
||
| Timed Application | Repeated screenshots of an application window, at timed intervals. After the first screenshot, only differential bitmaps are sent. However, people who join a session in progress get a full update, followed by differential bitmaps. | |
| Timed Window | Repeated screenshots of a selected window inside a multi-window application, such as showing only the slides in a Powerpoint window without showing the Powerpoint application buttons. | |
| Timed Region | Repeated screenshots of a defined region of your screen. | |
Dynamic Desktop (application sharing) |
||
| Dynamic Desktop | Share an application that is running on your desktop. Users can see and interact with the actual application. See Dynamic Desktop. | |
Twain Capture |
||
| Twain capture | Capture an image through a Twain device installed on your computer, and send it.
Twain is technology that is included in software that accompanies many devices such as scanners and web cameras. With it, you can transfer the image from an external device to your computer. If your Twain device is a video camera, you can send video images. The images are captured as frames from your video device at timed intervals and sent. See Twain Captures. |
|
General instructions:
- Right-click the hotCam icon. From the menu, select the option you want. The icon changes.
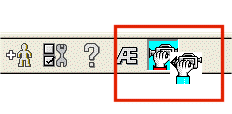
- Left-click the hotCam icon. It changes color, and a special cursor lifts up.
It becomes a moveable icon, as in this example.
- Bring the open window or application that you want to display to the front by clicking on its titlebar. (The special cursor disappears temporarily while you do this.)
- Click the special cursor anywhere in the window area. hotCam shoots the picture and sends it.
hotCam sends whatever is in the part of your screen covered by the selected window. If other material gets in front of that window, the part of the second window that covers the window you're sending will also be sent.
7/30/2007 - Troubleshooting: If the camera icon turns blue but the cursor does not lift up, close hotComm and restart your computer. That means that the camera module has not loaded correctly.
Still and Still Collaborative
If you selected Still, the screenshot displays as a graphic in a hotCam window on each peer's computer.
If you selected Still Collaborative, the screenshot displays in a hotWeb window on each peer's computer. You can then use the hotWeb tools for collaboration.
A copy of each Still or Still Collaborative screenshot is saved automatically in each peer's hotComm/UPLOADS folder.
Timed
To set the interval for timed screenshots, right-click the camera icon and select Set Timer Interval. The interval is in seconds. See hotCam Interval.
With timed camera, after the first screenshot, only differential bitmaps are sent. However, people who join a session in progress get a full update, followed by differential bitmaps.
Note: Timed hotCam screenshot and video capture updates may skip low bandwidth users until the next update cycle.
Powerpoint Presentations
To set up a Powerpoint presentation for display to large groups:
-
hotComm: right-click the camera icon and select Set Timer Interval. Set the interval to 3 seconds.
hotComm Lite: Select the 3 second mode instead of the 15 sec mode (right-click) that will be in the .031 release. -
Start Powerpoint and open your presentation. From the Powerpoint File menu, select Print Preview Mode. Size the dialog box to approximately 640x480 or the minimum comfortable viewing size for your presentation.
-
Click the timed camera onto slide 1 and wait for the Microphone button to flash vs. solid.
-
Turn on the Microphone and start presentation. Each time you page down, scroll or click to go to next slide, stop talking for a few seconds to allow the slides to be updated on the participants' computers.
hotCam Interval
Set the number of seconds between updates for the Timed Camera. To set it, right-click the camera icon, and select Set Timer Interval. Scroll the arrows in Capture every __ seconds until you reach the number of seconds you want.
We recommend that you start with a 1 second interval, and then adjust it according to your audience. If you get complaints about charts freezing, then increase the interval (that means your audience doesn't have as much available bandwidth or processing capability as they think they do).
| Setting | For audience with ... |
| 1 second | High bandwidth, fast graphics processing |
| 3 seconds | Lower bandwidth |
Bring to Front
If the Bring to Front option is checked, the hotCam images you receive are forced to the front of all other windows.
To set it, right-click the camera icon, and select Set Timer Interval, then check the Bring to Front check-box.
TrueColor
The TrueColor setting controls how much color is displayed in the images you present. To set it, right-click the camera icon and select Set Timer Inverval. Then check or un-check the TrueColor checkbox.
| Your Setting | Server Room Profile Setting | Result |
| Unchecked | Checked or Unchecked | Image color is 9 bit, 512 colors. Best business-class setting for live charts. |
| Checked | Unchecked | Image color is 12 bit. Best setting for PowerPoint. |
| Checked | Checked | Image color is 32 bit, totally lossless. Best for x-rays and very-high precision. |
TrueColor note: If the presenter's monitor is set to 32-bit color, and the presenter has checked the hotComm TrueColor feature, and there are any Java users in the session, then the image is displayed at 16-bit color. If the presenter's monitor is set to 32-bit color and the presenter has checked the hotComm TrueColor feature and there are no Java users in the room, then the image is displayed at 32-bit color.
Start hotPointer
If the Start hotPointer on Timed Camera option is checked, the hotPointer cursor is started automatically when you turn on Timed Camera. The hotPointer is the colored cursor that users can see as you present. Note that the hotPointer feature requires a hotComm Pro license or hotComm CL logged in as moderator or presenter.
To set it, right-click the camera icon, and select Set Timer Interval, then check the Start hotPointer on Timed Camera check-box.
ThruVu
The ThruVu feature makes your hotComm chat window transparent to the camera. You can have your hotComm chat window on top of the material you're presenting, but the chat window will not be visible to the viewers. You can determine how transparent you want the chat window to seem to you. To set ThruVu:
- To set how transparent the chat window seems to you, right-click the camera icon, and select Set Timer Interval. Then select a transparency percentage. The default as of 7/30/2007 is 75%.
- To turn ThruVu on and off, click View and check (or un-check) This session in ThruVu.
| Contents | First | Back | Next | Last | Printable | 1stWorks Support |
|
© 2026 1stWorks Corporation. All rights reserved. See our terms of use. All trademarks and registered trademarks are the property of their respective owners. |