
How to Delete Prior Installation Files
|
Document number: TEMP.02
Copyright (c) 2003-2004 1stWorks Corporation. All rights reserved. |
Problem: Can't update
If you download and install a hotComm update, but continue to get the notice telling you to update, this usually means that Windows is installing an older version of the installation file that you stored on your computer or that was saved automatically in Windows as as a temporary Internet file.
Solution: Delete Temporary Internet Files, delete any hotComm installation files you specifically saved to your computer, and download the update again.
Prevention: Always delete Temporary Internet files before starting to download an update, and in the File Download window that appears when you start the download, always choose Open or Run instead of Save.
Delete Temporary Files
How do I delete Temporary Internet Files (clear cache)?
Instructions are provided for deleting temporary Internet Files (clearing cache) through Windows Control Panel, Internet Explorer, Firefox, Safari, Opera, AOL and Netscape.- Windows Control Panel - delete Temporary Internet Files:
Windows Vista
- Click the Windows Start menu.
- Select Control Panel, (or Settings and then Control Panel).
- Select Internet Options, (or Network and Internet Connections and then Internet Options).
- Under Browsing History, click the Delete button.
- In the Delete Browsing History window, click the Delete Files button.
- When asked if you are sure you want to delete all temporary Internet files, click Yes.
- To close the windows, click Close, then Ok
Windows XP
- Click the Windows Start menu.
- Select Control Panel, (or Settings and then Control Panel).
- Select Internet Options, (or Network and Internet Connections and then Internet Options).
- Select the General tab.
- In the Temporary Internet Files section, click the Delete Files button.
- Do not check the clear Offline Content box. Click Ok.
- Close the Internet Properties and Control Panel windows.
- Internet Explorer - delete Temporary Internet Files:
Internet Explorer 7.0
- Open Internet Explorer.
- Select the Tools menu.
- Select Internet Options.
- Under Browsing History, click the Delete button.
- In the Delete Browsing History window, click the Delete Files button.
- When asked if you are sure you want to delete all temporary Internet files, click Yes.
- To close the windows, click Close, then Ok.
Internet Explorer 6.0
- Open Internet Explorer.
- Select the Tools menu.
- Select Internet Options.
- Select the General tab.
- In the Temporary Internet Files section, click the Delete Files button.
- Do not check the clear Offline Content box. Click Ok.
- Click Ok to close the Tools window.
- FireFox (Mozilla) - clear cache
Firefox 3.0
- Open FireFox (Mozilla).
- Click the Tools menu.
- Click Clear Private Data.
- Check Cache. Note that any other checked items will also be cleared, so un-check any that you do not want to clear.
- Click the Clear Private Data Now button.
Firefox, older versions- Open FireFox (Mozilla).
- Click the Tools menu.
- Click Options.
- Click Privacy.
- Click the Clear button for Cache.
- Safari - clear cache
Safari 3.1.2
- Open Safari.
- Click the Edit menu.
- Click Empty Cache....
- When asked if you are sure you want to empty the cache, click the Empty button.
- Opera - clear cache
Opera 9.5.2
- Open Opera.
- Click the Tools menu.
- Click Delete Private Data.
- In the Delete Private Data window, click Detailed Options.
- Check Delete Entire Cache. Note that any other checked items will also be cleared, so un-check any that you do not want to clear.
- Click Delete.
- AOL - clear browser cache:
AOL 9.0
- Click Settings.
- Select the Index tab, and click Internet [Web] Options.
- Under Browsing History, where it says to Delete temporary files, cookies, saved passwords, and web form information, click Delete.
- Wait while the files are deleted, then click OK.
AOL 7.0
- In Keyword, enter: PREFERENCES. Or, on the Settings menu on the AOL toolbar, click Preferences.
- In the Organization section of the Preferences window, click Internet Properties (WWW).
- In the Temporary Internet Files section, click Delete Files.
- Click OK.
- Netscape - clear browser cache
- Open Netscape.
- Click the Edit menu.
- Click Preferences.
- Click Advanced. It expands to show a list of options.
- Click Cache.
- Click Clear Memory Cache.
- Click Clear Disk Cache.
- Click OK.
- Click the Tools menu.
- Click Download Manager.
- Highlight the hotComm installation program and click Remove from list.
- Close the Download Manager window.
Netscape Download Manager - remove installation file
Updated 9/30/08
Delete Saved Installation Files
If you usually select Save when you download the installation program, find and delete it.
- Open the Windows Start menu. Select Search or Find:
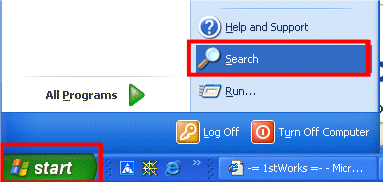
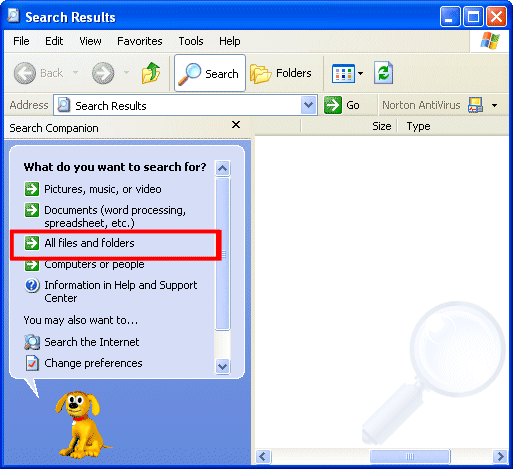
- Select Files and folders
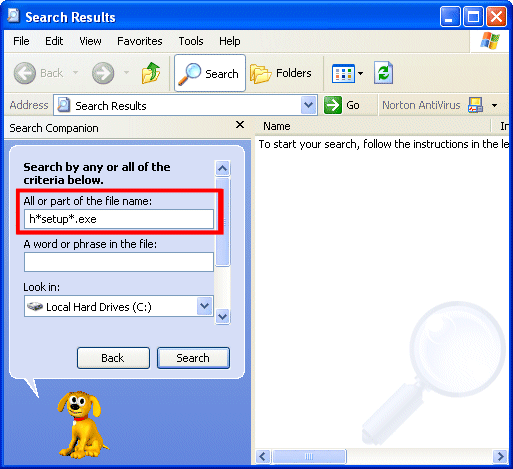
- Type h*setup*.exe as the filename.
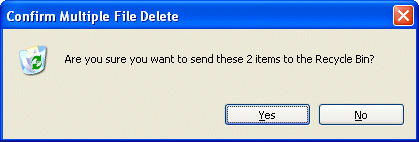
- Highlight the files that were found and press the Delete key.
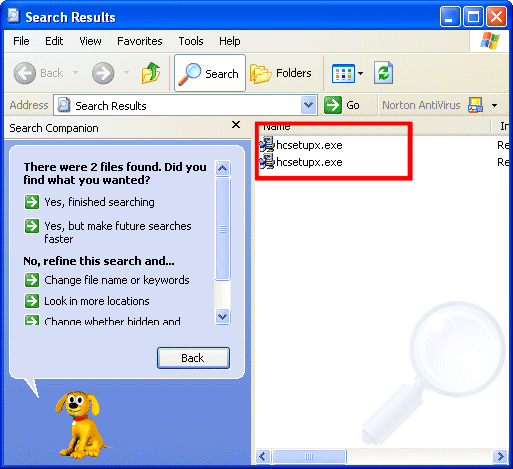
- Click Yes to delete the files.
- Close the windows.
- Try the update again.
For hotComm Lite or hotComm Standard/Pro: click here to return to the Try / Buy page at our website, www.hotcomm.com. Click on the Alternate link for your product.
For hotComm CL: click here to go to the hotComm CL page. Click on the hotComm CL Alternate link.
| Return to: | How to Install hotComm Lite |
| How to update hotComm Lite | How to Install hotComm Standard/Pro |
| How to update hotComm Standard/Pro |
Top